jedit43_setup
Setting up jEdit 4.3 to use with Topas
You should be able to set up any version of jedit to work with any version of topas after 4.1. These instructions are for jedit 4.3 which I know works on 100s of computers worldwide. There are more recent and simplified instructions for jEdit5.5.
If you use jedit with topas please register here; I’ll periodically send information about updates and bug fixes.
Install was updated 1/6/2017 for Topas v6 – please tell me if anything is broken.
0. Note on privileges, folders, etc
Many universities now have centrally-managed computers where users can’t write to local drives and don’t have any admin/install privileges. TOPAS normally needs to sit in a local folder where the user has write access. It’s also convenient to have access to the jEdit folder. Installation on university computers can therefore be a bit painful and/or may only work for a single login id.
The solution to this will be different depending on your university’s set up. In Durham the easiest way is currently (January 2020) to have a folder called C:\topas_v6 and a folder called C:\jedit on the local C: drive. These folders (only) need to be full access (read, write, execute) for all users. You might need to use the windows commad “icacls” to achieve this. Avoid spaces in these directory names. Our IT service are willing to grant this level of access. Persuade yours to do the same! jEdit can be installed to this directory by an administrator or anybody with “Run as administrator privelges” (right click and select option rather than just double clicking.
1. Download and install Java if it’s not already installed.
To run jedit you may need to install Java run time environment. You probably won’t need to do this on a reasonably up to date pc. You need Java 1.7 for the latest versions of jedit, but can use older versions (1.5) for jedit 4.3.
2. Download jedit installation and set up files
Dowload the single .zip file linked here. This contains all the files needed to install jedit and configure it for use with topas. Extract this to any folder on your hard disk. It will create a directory called “jedit43_setup” which contains all the files you need. N.B. these represent a frozen version of jedit and plugins. More up to date versions of jedit are available from the group that develop jedit at http://www.jedit.org but I don’t guarantee they work with topas.
3. Install jEdit 4.3
Install jedit4.3 by running the file jedit4.3pre16install.exe which is in the “jedit43_setup” folder.
jEdit will normally install into two directories:
Application: c:\program files\jedit
Users data: c:\documents and setting\USER\.jedit
4. Install Plugins
To gain the full power of jedit you need to install various plugins (xinsert, console, editor scheme, xsearch and errorlist). In the “jedit_setup” folder you’ll find a folder called “jars”. Copy this folder to C:\Program Files\jEdit\ or the equivalent directory on your computer. You’ll then need to restart jedit (In some installations these may need to go to C:\Documents and Settings\user\.jedit). Alternatively you can install these plugins from the jedit website or using the plugin manager in jedit.
If the plugins don’t appear in sensible places when you launch jedit use: Utilities/Global Options/Docking and choose to dock xinsert on the left, and the file browser/console at the bottom of the screen. Once docked, clicking on the docked title hides/unhides docked windows. Thus XInsert and the File Browser can be docked/hidden at all times.
5. Setting up jEdit for editing INP files
To set up jedit to interact with topas you need to run amacro (inp-setup.bsh) within jedit. This macro is in the “jedit43_setup” directory. In jedit go to:
Macros/Run Other macro/navigate and select inp-setup.bsh (in “jedit43_setup” directory).
[N.B. a few people have reported problems when topas is installed in a directory name including spaces. If you have a choice, I’d recommend using a directory name without spaces. C:\topasa is what we use in Durham. Remember though that for version 4 the license Alan sends you is directory specific – if you change the topas directory name the software will no longer run.
You may then need to quit jedit and relaunch it for changes to take place.
Your xinsert menu will by default contain pull down menus in addition to the topas ones. If you want to hide these go to Plugins/Plugin Options. On the window that comes up click on Xinsert in the left hand pane. Click off all the menus you don’t want to view on the right hand pane.
6. Editing in jedit
At its simplest level jedit can be used like any other text editor. The xinsert menus and the ability to automatically colour code certain parts of the file make it extremely efficient for creating and viewing topas input files.
To automatically colour code your input files: Go to Plugins/Editor Scheme Selector and select “inp.scheme” from the left hand window then click Apply and Close. Now topas key words will be in dark blue, numbers in royal blue, refined numbers in red, comments in green, etc. These colour rules are defined in INP.JEDIT-SCHEME and INP_MODE.XML.
Column editing is an extremely powerful feature of jedit and allows you to e.g. edit large numbers of atoms simultaneously. Hold down the ctrl key and select a column of text. What you type will then appear in all rows.
Jedit allows predictive completion of topas keywords. In any .inp file try typing “app” then hitting ctrl-b. You’ll be given a choice of possible keywords.
Hypertext searching is a very rapid way of finding multiple occurences of an expression in a file. Highlight a text string, hold down alt and press “.” (full stop or period depending on your location).
The cursor shape and whether it blinks can be changed using: Utilities/Global Options/Text Area
If you set up folding then you can use the ‘{{{ topas instructions ‘}}} syntax in your input files to hide away sections you don’t want to view. I think you do this with: Utilities/global options; Go to Editing on the left; On the right it should say “Folding mode”, Select explicit; In the box below that type “1” for “Initially collapse folds with level”.
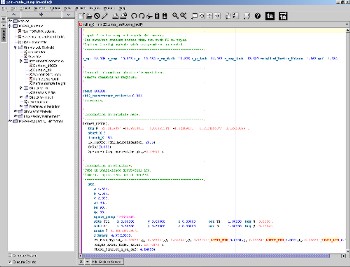
7. Results
If everything has been set up properly your jedit screen should look something like the image below (click for higher resolution) but with more modern icons!
8. Commercial Topas
jEdit should work with the commercial version of Topas. You just need to make sure you are in launch mode not gui mode (press the “rocket” icon in the run window). If you want the various example files linked from menus then download the zip file linked here and extract to a folder called “test_examples” in your main topas folder.
9. Examples
Go here for some simple jedit examples.
10. Register
If you haven’t already done so, please register here. I’ll periodically send information about updates and bug fixes.